Add to Favorites

Product Videos

Product Videos
Cornices
video img
Skirtex
Skirtex is a material used for upholstery or soft cornices.
VIEW
Drapery Panels
video img
Cartridge Pleat Tape
See how to use Cartridge Pleat tape to create pleated drapery panels.
VIEW
video img
Clip-n-Wave Tape
See how to use Clip-n-Wave tape to create a wave style drapery heading.
VIEW
video img
Deep Pleat Header Tape and 4-Prong Drapery Hooks
Create easy pleated draperies with this sew-on tape and unique drapery pins.
VIEW
video img
Goblet Pleat Tape
Learn how to use Goblet Pleat Tape to make a pleated drapery heading.
VIEW
video img
Serpentine Tape
See how to use Serpentine Tape to create a simple drapery or valance heading.
VIEW
Elements® Express Cellular Shades
video img
Cutting Elements® Express Cellular Shades
Learn how to cut your Elements® Express Cellular Shades.
VIEW
Elements® Shade Collection
video img
Inside Look: Elements® Roller Shade Machine
All Elements® shades are assembled in the USA. Take an inside look at the state-of-the art roller shade machine in our Dallas, TX facility.
Roller Shade Fabric Shown: RS2-1402, Nightfall Room Darkening in Mason Gray
VIEW
video img
Introducing Elements® Shade Collection

Learn about our new Elements® Shade Collection features and benefits, customized options to specify the perfect shade solutions, and how to purchase and tools available to sell the Elements® program to your customers.

VIEW
Grommets
video img
Cutting and Setting Grommets
Learn how to cut and set grommets using the Grommet Press from Rowley.
VIEW
video img
Decorative Grommets: Nomad Design
These grommets can be used for drapery panels or as a decorative accent on pillows, cornice boards or shades.
VIEW
video img
EZ-Set Grommets and Grommet Setter
Learn how to use the EZ-Set™ Grommets and Grommet Setter for window treatments and as embellishments.
VIEW
video img
Grommet Sample Packs
See what is included in the Rowley Company Grommet Sample Pack.
VIEW
video img
Grommet Selection
Tips for selecting grommet sizes.
VIEW
video img
Grommet Spacing
How to space your grommets.
VIEW
video img
Grommet Tape
See how to use the Grommet Tape from Rowley Company to make grommet drapery panels.
VIEW
video img
Hand Adapter for Grommets
VIEW
video img
Introduction to Button & Grommet Press
See all of the projects our grommet press can be used for. It is a real time saver.
VIEW
video img
Plastic Snap Together Grommets
Plastic grommets can be used for draperies, valances or as embellishments.
VIEW
video img
Rubber Grommet Washer
Use this product when making grommet draperies with thin or slippery fabrics.
VIEW
video img
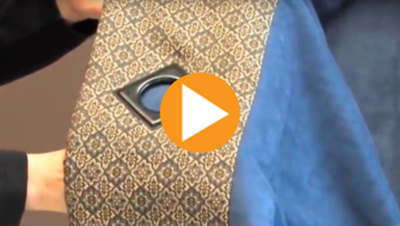
Square Grommets
See our new, decorative square grommets. They make a great accent on custom-made window treatments. Available in 7 fashion colors.
VIEW
Hardware
video img
How To Order R-TEC Automation® Drapery Hardware Systems

How To Order R-TEC Automation® Drapery Hardware Systems

Table of Contents:

0:00:05 | Intro - How To Order R-TEC Automated Track Systems

                 0:00:45 | Step 1 - Select the System

                 0:01:19 | Step 2 - Select the Track Color

                 0:01:49 | Step 3 - Select the Motor Power

                 0:02:30 | Step 4 - Select the Drapery Style, Draw & Master Carrier

                 0:03:56 | Step 5 - Select the R-TEC Smart Controls


0:04:55 | Intro - How To Order Automated 1 3/8" H-Rail

                 0:05:40 | Step 1 - Select Kit Style

                 0:06:30 | Step 2 - Select the Kit Finish

                 0:06:57 | Step 3 - Select the Select the Motor Power

                 0:07:44 | Step 4 - Select the Drapery Style, Draw & Master Carrier

                 0:08:56 | Step 5 - Select R-TEC Smart Controls

View the Mastering Motorization Series

VIEW
video img
Mastering Motorization | Components & Add-Ons in R-TEC Automation® Drapery Hardware Systems

Components & Add-Ons in R-TEC Automation® Drapery Hardware Systems

Table of Contents:

0:00:05 | Intro - R-TEC Automation® Track System Components

0:00:27 | Intro - Components for Automated 1 3/8" H-Rail Systems

0:00:42 | Push 5 Channel Handheld Remote

0:00:48 | Slim Drapery Motor, Li-ion Battery + Charger

0:01:00 | AC Power Options

0:01:20 | AriA® Antiquities Finials

0:01:38 | Intro - Components for R-TEC Automated Track Systems

0:01:49 | Push 5 Channel Handheld Remote

0:01:53 | Slim Drapery Motor, Li-ion Battery + Charger

0:02:00 | AC Power Options

0:02:07 | Finestra® Fascia + Finials

View the Mastering Motorization Series

VIEW
video img
Mastering Motorization | How To Install R-TEC Automation® Drapery Hardware Systems

How To Install R-TEC Automation® Drapery Hardware Systems

Table of Contents:

0:00:05 | Intro - Installation Tips - Automated 1 3/8" H-Rail Traverse

                 0:00:22 | Bracket Mounting Recommendations

                 0:00:49 | Installing the H-Rail Brackets

                 0:01:42 | Installing the System


0:02:10 | Intro - Installation Tips - R-TEC Automation Track System

                 0:02:16 | Bracket Location

                 0:03:49 | Wall Mount Assembly OR Ceiling Mount Assembly

                 0:04:04 | Install System into Quick Connect Clip

                 0:04:29 | Center Opening System

                 0:05:06 | Ripplefold and Pinch Pleat Install End Hooks

                 0:05:15 | Fascia Installation on Track

                 0:05:31 | Finial Installation on Fascia

View the Mastering Motorization Series

VIEW
video img
Mastering Motorization | How To Attach the Motor, Pair & Program R-TEC Automation® Drapery Systems

How To Attach the Motor, Pair & Program R-TEC Automation® Drapery Systems

Table of Contents:

0:00:05 | Intro - Attaching Motors to R-TEC Automation Systems

                 0:00:15 | Align and Engage the Li-ion Battery or AC Power with the Motor

                 0:00:31 | Align and Engage the Motor with the Drive Pulley

                 0:00:42 | Charging Instructions


0:00:53 | Intro - How To Pair and Program Push5 Remote to R-TEC Automation Systems

                0:01:36 | Pair

                0:02:19 | Check and Change Direction of the Motor

                0:03:10 | Set Favorite Position

                0:04:21 | Lock the Remote

                0:05:28 | Reset to Factory Settings


0:06:00 | Intro - How To Pair and Program Push15 Remote to R-TEC Automation Systems

                0:07:16 | Pair

                0:07:52 | Check and Change Direction of the Motor

                0:08:35 | Set Favorite Position

                0:09:17 | Lock the Remote

View the Mastering Motorization Series

VIEW
video img
Button Embellishments from Finestra® Decorative Hardware
View these neat ways to embellish your custom sewing projects, including pin-on and sew-on buttons from Finestra® Decorative Hardware, available exclusively at Rowley Company. Two styles are available, in 3 hand-rubbed custom finishes. You are sure to find the perfect accent for your drapery panels, valances, decorative pillows and more.
VIEW
video img
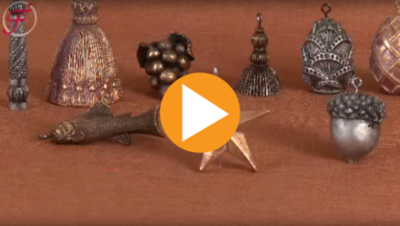
Clear Batons
Let us show you how to use our Clear Batons.
VIEW
video img
Drapery Batons
See the wide variety of batons available for cord-free traversing drapery.
VIEW
video img
Finestra® Decorative Hardware Buttons and Tassels
Beautiful, new details for home decor including Button Embellishments, Button Borders and Tassels from Finestra® Decorative.
VIEW
video img
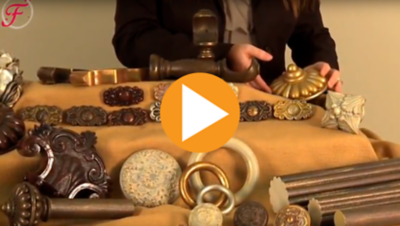
Finestra® Decorative Hardware Quick Ship Program
See the Finestra®Decorative Hardware Quick Ship Program, which consists of our top 50 designs, in our 25 most popular finishes, and best of all, they ship out to you in only 5 days. See our drapery poles, finials, holdbacks, medallions and more.
VIEW
video img
Finestra® Decorative Hardware Routed Poles
Routed poles can be used with shades or traversing drapery. Choose primed and ready-to-paint or a custom paint finish from Finestra® Decorative Hardware.
VIEW
video img
Finished Button with Clasp
Explore our finished buttons with clasp.
VIEW
video img
How to Assemble R-TEC Automation® One-Way Draw Traverse System
Learn how to assemble a R-TEC Automation® One-Way Draw Traverse System.
VIEW
video img
How to Assemble R-TEC Automation® Double Splice Track System
Learn how to unbox, unpackage and assemble your R-TEC Automation® Double Splice Track System. 2-person assembly and installation suggested. For more videos, visit R-TEC Automation® Product Videos.
VIEW
video img
How to Change the Cord Position on R-TRAC Cord Draw Track Systems
Learn how to change the cord position on your R-TRAC 4001 Cord Draw Track Systems.
VIEW
video img
How to Assemble R-TEC Automation® Single Splice Track System
Learn how to unbox, unpackage and assemble your R-TEC Automation® Single Splice Track System. 2-person assembly and installation suggested. For more videos, visit R-TEC Automation® Product Videos.
VIEW
video img
How to Remove Extra Pinch Pleat Carriers from the R-TRAC Cord Draw Track Systems
Learn how to remove extra Pinch Pleat carriers from your R-TRAC 4001 Cord Draw Track Systems.
VIEW
video img
How to Remove Extra Pinch Pleat Carriers from the R-TEC Automation® Track Systems
Learn how to remove extra pinch pleat carriers from the R-TEC Automation® Track Systems. 2-person assembly and installation suggested. For more videos, visit R-TEC Automation® Product Videos.
VIEW
video img
How to Remove Extra Ripplefold Carriers from the R-TEC Automation® Track Systems
Learn how to remove extra Ripplefold carriers from the R-TEC Automation® Track Systems. 2-person assembly and installation suggested. For more videos, visit R-TEC Automation® Product Videos.
VIEW
video img
How to Remove Extra Ripplefold Carriers from the R-TRAC Cord Draw Track Systems
Learn how to remove extra Ripplefold carriers from your R-TRAC 4001 Cord Draw Track Systems.
VIEW
Headboards
video img
Headboard Cleat
Let us show you how to use our Headboard Cleats.
VIEW
Installation
video img
Curtain Rods
Curtain rods are used to install draperies or top treatments with rod pocket headings and can also be used for pleated, stationary side panels.
VIEW
video img
Hollow Wall Fasteners
Watch as we show you how to use the Hollow Wall Fasteners.
VIEW
video img
How to Assemble R-TEC Automation® One-Way Draw Traverse System
Learn how to assemble a R-TEC Automation® One-Way Draw Traverse System.
VIEW
video img
How to Assemble R-TEC Automation® Double Splice Track System
Learn how to unbox, unpackage and assemble your R-TEC Automation® Double Splice Track System. 2-person assembly and installation suggested. For more videos, visit R-TEC Automation® Product Videos.
VIEW
video img
How to Change the Cord Position on R-TRAC Cord Draw Track Systems
Learn how to change the cord position on your R-TRAC 4001 Cord Draw Track Systems.
VIEW
video img
How to Assemble R-TEC Automation® Single Splice Track System
Learn how to unbox, unpackage and assemble your R-TEC Automation® Single Splice Track System. 2-person assembly and installation suggested. For more videos, visit R-TEC Automation® Product Videos.
VIEW
video img
How to Remove Extra Pinch Pleat Carriers from the R-TRAC Cord Draw Track Systems
Learn how to remove extra Pinch Pleat carriers from your R-TRAC 4001 Cord Draw Track Systems.
VIEW
video img
How to Remove Extra Pinch Pleat Carriers from the R-TEC Automation® Track Systems
Learn how to remove extra pinch pleat carriers from the R-TEC Automation® Track Systems. 2-person assembly and installation suggested. For more videos, visit R-TEC Automation® Product Videos.
VIEW
video img
How to Remove Extra Ripplefold Carriers from the R-TEC Automation® Track Systems
Learn how to remove extra Ripplefold carriers from the R-TEC Automation® Track Systems. 2-person assembly and installation suggested. For more videos, visit R-TEC Automation® Product Videos.
VIEW
video img
How to Remove Extra Ripplefold Carriers from the R-TRAC Cord Draw Track Systems
Learn how to remove extra Ripplefold carriers from your R-TRAC 4001 Cord Draw Track Systems.
VIEW
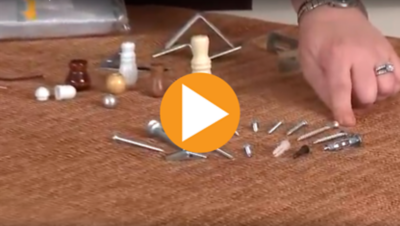
video img
Installation Sample Pack
See what is included in the Installation Sample Pack from Rowley Company
VIEW
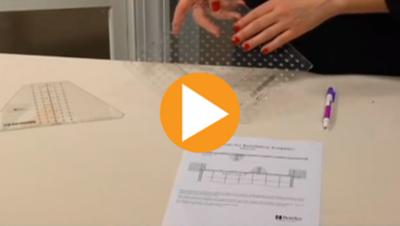
video img
Installation Template
Watch as we show you how to use the installation template. They are used to quickly mark drapery bracket and center support installation holes and methods of establishing height and width from window/door trim.
VIEW
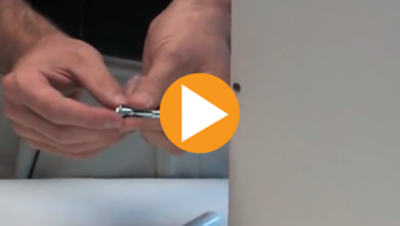
video img
Installing Hollow Wall Fasteners
Watch as we demonstrate how to use our hollow wall fastening tool to make fast work of drapery installations in drywall. You'll learn about the tool and the fasteners it uses.
VIEW
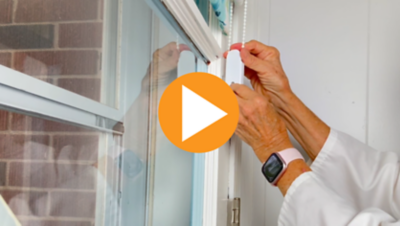
video img
Installing the Universal Drive Cord Tension Device
See how to install the Universal Drive Tension Device with bead chain loop. This device is used on bead and cord loops to keep them taut and secure and complies with the 2010 ANSI Standards for Corded Window Coverings.
VIEW
video img
Laser Measurer
Watch as we show you how to use the Laser Measurer tool.
VIEW
video img
Nail Holder/Starter
Watch as we show you how to use the Nail Holder. Powerful magnet holds nails, tacks or braces in place when installing to prevent injuries.
VIEW
video img
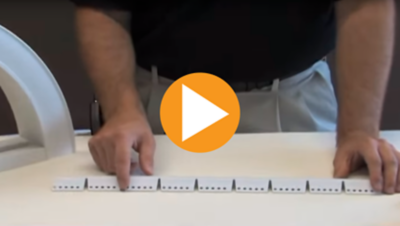
Notched Right-Angle Pin Strip
Learn about the features and uses of Rowley Company's Notched Right-Angle Pin Strip. It makes installing window treatments in arched windows a snap.
VIEW
video img
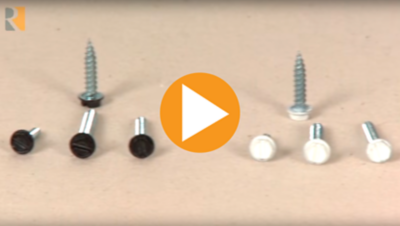
Painted Hex Head Screws
See how painted hex head screws can save you time when installing custom window treatments.
VIEW
video img
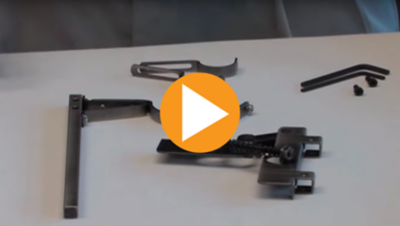
Ready Hang Bracket
Let us show you a innovative system that attaches decorative poles or cornices to a window trim versus drilling into the wall.
VIEW
video img
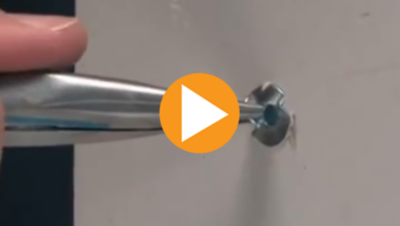
Removing Hollow Wall Fasteners
Watch as we show you how to remove hollow wall fasteners once you've installed them.
VIEW
video img
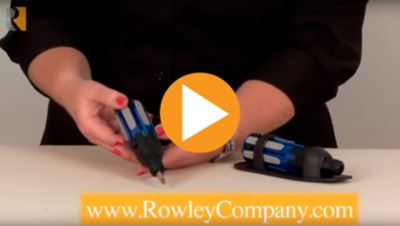
Retractable Bit Screwdriver
See the many functions our our 6-in-1 retractable bit screwdriver.
VIEW
video img
Screw Eye Drivers
Rowley Company screw eye drivers are a fast and efficient way to add screw eyes when making shades and other projects. In this video you will learn how to use this clever tool.
VIEW
video img
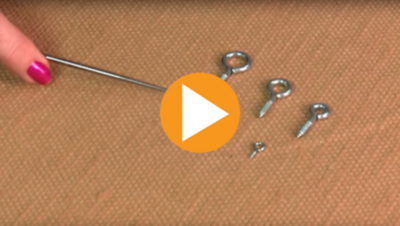
Screw Eyes
Learn more about the five sizes of screw eyes offered by Rowley Company.
VIEW
video img
Silicone Spray
Learn the uses for Rowley Company Silicone Spray in drapery installation and more.
VIEW
video img
Spring Tension Rods
In this video you will see the spring tension rods from Rowley Company, and learn how to adjust them.
VIEW
video img
Tape Measure Grip
Watch as we show how the tape measure grip works. Rubber grip holds end of tape measure securely without scratching surfaces.
VIEW
Mastering Motorization
video img
How To Order R-TEC Automation® Drapery Hardware Systems

How To Order R-TEC Automation® Drapery Hardware Systems

Table of Contents:

0:00:05 | Intro - How To Order R-TEC Automated Track Systems

                 0:00:45 | Step 1 - Select the System

                 0:01:19 | Step 2 - Select the Track Color

                 0:01:49 | Step 3 - Select the Motor Power

                 0:02:30 | Step 4 - Select the Drapery Style, Draw & Master Carrier

                 0:03:56 | Step 5 - Select the R-TEC Smart Controls


0:04:55 | Intro - How To Order Automated 1 3/8" H-Rail

                 0:05:40 | Step 1 - Select Kit Style

                 0:06:30 | Step 2 - Select the Kit Finish

                 0:06:57 | Step 3 - Select the Select the Motor Power

                 0:07:44 | Step 4 - Select the Drapery Style, Draw & Master Carrier

                 0:08:56 | Step 5 - Select R-TEC Smart Controls

View the Mastering Motorization Series

VIEW
video img
Mastering Motorization | Components & Add-Ons in R-TEC Automation® Drapery Hardware Systems

Components & Add-Ons in R-TEC Automation® Drapery Hardware Systems

Table of Contents:

0:00:05 | Intro - R-TEC Automation® Track System Components

0:00:27 | Intro - Components for Automated 1 3/8" H-Rail Systems

0:00:42 | Push 5 Channel Handheld Remote

0:00:48 | Slim Drapery Motor, Li-ion Battery + Charger

0:01:00 | AC Power Options

0:01:20 | AriA® Antiquities Finials

0:01:38 | Intro - Components for R-TEC Automated Track Systems

0:01:49 | Push 5 Channel Handheld Remote

0:01:53 | Slim Drapery Motor, Li-ion Battery + Charger

0:02:00 | AC Power Options

0:02:07 | Finestra® Fascia + Finials

View the Mastering Motorization Series

VIEW
video img
Mastering Motorization | How To Install R-TEC Automation® Drapery Hardware Systems

How To Install R-TEC Automation® Drapery Hardware Systems

Table of Contents:

0:00:05 | Intro - Installation Tips - Automated 1 3/8" H-Rail Traverse

                 0:00:22 | Bracket Mounting Recommendations

                 0:00:49 | Installing the H-Rail Brackets

                 0:01:42 | Installing the System


0:02:10 | Intro - Installation Tips - R-TEC Automation Track System

                 0:02:16 | Bracket Location

                 0:03:49 | Wall Mount Assembly OR Ceiling Mount Assembly

                 0:04:04 | Install System into Quick Connect Clip

                 0:04:29 | Center Opening System

                 0:05:06 | Ripplefold and Pinch Pleat Install End Hooks

                 0:05:15 | Fascia Installation on Track

                 0:05:31 | Finial Installation on Fascia

View the Mastering Motorization Series

VIEW
video img
Mastering Motorization | How To Attach the Motor, Pair & Program R-TEC Automation® Drapery Systems

How To Attach the Motor, Pair & Program R-TEC Automation® Drapery Systems

Table of Contents:

0:00:05 | Intro - Attaching Motors to R-TEC Automation Systems

                 0:00:15 | Align and Engage the Li-ion Battery or AC Power with the Motor

                 0:00:31 | Align and Engage the Motor with the Drive Pulley

                 0:00:42 | Charging Instructions


0:00:53 | Intro - How To Pair and Program Push5 Remote to R-TEC Automation Systems

                0:01:36 | Pair

                0:02:19 | Check and Change Direction of the Motor

                0:03:10 | Set Favorite Position

                0:04:21 | Lock the Remote

                0:05:28 | Reset to Factory Settings


0:06:00 | Intro - How To Pair and Program Push15 Remote to R-TEC Automation Systems

                0:07:16 | Pair

                0:07:52 | Check and Change Direction of the Motor

                0:08:35 | Set Favorite Position

                0:09:17 | Lock the Remote

View the Mastering Motorization Series

VIEW
video img
Mastering Motorization | How To Assemble R-TEC Automation® Shade Tube

How To Assemble R-TEC Automation® Shade Tube

Table of Contents:

0:00:05 | Intro - R-TEC Automation® Shades

                 0:01:11 | Components

                 0:01:59 | Attach the Crown & Drive Set to the Shade Motor

                 0:02:43 | Place Motor Adapter on End of the Motor

                 0:03:45 | Slide Motor into Tube

                 0:04:10 | Place the End Pin in Tube

                 0:04:29 | Summary

                 0:04:45 | Custom Solutions

View the Mastering Motorization Series

VIEW
video img
Mastering Motorization | How To Pair & Program R-TEC Automation® Shades

How To Pair & Program R-TEC Automation® Shades

Table of Contents:

0:00:05 | Intro - Basic Programming for R-TEC Automated Shade Systems

                 0:00:30 | Pair the Motor to the Remote

                 0:01:08 | Check or Change the Direction of the Shade Motor

                 0:01:55 | Set the Upper and the Lower Limits

                 0:05:05 | Set a Favorite Position

                 0:06:48 | Lock the Remote

                 0:07:55 | Reset to Factory Settings

View the Mastering Motorization Series

VIEW
Notions
video img
Double Ended Needles
Learn how to use double ended needles from Rowley Company.
VIEW
video img
Gimp Trim
See Rowley Company's gimp trim product offering.
VIEW
video img
John James Hand-Sewing Needles
See the complete collection of John James hand-sewing needles.
VIEW
video img
Joining Decorative Twist Cord
See how to join two ends of decorative twist cord for pillows, duvets, cushions or window treatments.
VIEW
video img
Loading a Pull on the Nylon Zipper Chain
In this video you will see how to add zipper slides onto the nylon zipper chain.
VIEW
video img
Loading a Slide on Invisible Zipper
Learn how to install a slide on invisible zipper tape.
VIEW
video img
Loading Zipper Pulls on the Molded Tooth Zipper
See how to load zipper pulls onto the molded tooth zipper.
VIEW
video img
Pen Style Chalk Markers
Learn more about the pen style chalk markers.
VIEW
video img
Sew-On Tapes
Watch as we show you our wide variety of Sew-On Tapes. NOTE: The Austrian Shade Tape featured in this video is no longer available as it is not compliant with ANSI 2010 standards.
VIEW
video img
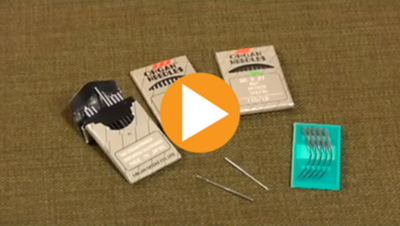
Sewing Machine Needles
See our complete collection of Sewing Machine Needles. High quality needles supplied as original equipment with many sewing machines.
VIEW
video img
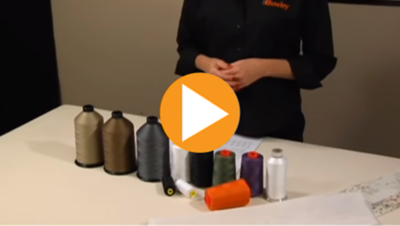
Thread
An overview of Thread products from Rowley Company including regular duty, outdoor and upholstery, blind hemming and more.
VIEW
video img
Zipper Threading
How to thread or install a zipper from Rowley Company
VIEW
Pillows
video img
Hand Sewn Pillow Closure
See how to hand sew a knife edge pillow closed.
VIEW
video img
Large Bolster
Learn more about our large bolster pillow forms.
VIEW
video img
New Pillow Shapes
See our new, pillow shapes and sizes. Down/feather or polyester pillow inserts.
VIEW
video img
Pillow Buttons
See how to create buttons for pillows.
VIEW
video img
Pillow Templates
See how to use pillow templates to cut perfect pillows easily and accurately. Both the tapered corner and square/round templates are shown in the demonstration.
VIEW
R-TEC Automation® - Drapery Hardware - Track Systems
video img
How To Order R-TEC Automation® Drapery Hardware Systems

How To Order R-TEC Automation® Drapery Hardware Systems

Table of Contents:

0:00:05 | Intro - How To Order R-TEC Automated Track Systems

                 0:00:45 | Step 1 - Select the System

                 0:01:19 | Step 2 - Select the Track Color

                 0:01:49 | Step 3 - Select the Motor Power

                 0:02:30 | Step 4 - Select the Drapery Style, Draw & Master Carrier

                 0:03:56 | Step 5 - Select the R-TEC Smart Controls


0:04:55 | Intro - How To Order Automated 1 3/8" H-Rail

                 0:05:40 | Step 1 - Select Kit Style

                 0:06:30 | Step 2 - Select the Kit Finish

                 0:06:57 | Step 3 - Select the Select the Motor Power

                 0:07:44 | Step 4 - Select the Drapery Style, Draw & Master Carrier

                 0:08:56 | Step 5 - Select R-TEC Smart Controls

View the Mastering Motorization Series

VIEW
video img
Mastering Motorization | Components & Add-Ons in R-TEC Automation® Drapery Hardware Systems

Components & Add-Ons in R-TEC Automation® Drapery Hardware Systems

Table of Contents:

0:00:05 | Intro - R-TEC Automation® Track System Components

0:00:27 | Intro - Components for Automated 1 3/8" H-Rail Systems

0:00:42 | Push 5 Channel Handheld Remote

0:00:48 | Slim Drapery Motor, Li-ion Battery + Charger

0:01:00 | AC Power Options

0:01:20 | AriA® Antiquities Finials

0:01:38 | Intro - Components for R-TEC Automated Track Systems

0:01:49 | Push 5 Channel Handheld Remote

0:01:53 | Slim Drapery Motor, Li-ion Battery + Charger

0:02:00 | AC Power Options

0:02:07 | Finestra® Fascia + Finials

View the Mastering Motorization Series

VIEW
video img
Mastering Motorization | How To Install R-TEC Automation® Drapery Hardware Systems

How To Install R-TEC Automation® Drapery Hardware Systems

Table of Contents:

0:00:05 | Intro - Installation Tips - Automated 1 3/8" H-Rail Traverse

                 0:00:22 | Bracket Mounting Recommendations

                 0:00:49 | Installing the H-Rail Brackets

                 0:01:42 | Installing the System


0:02:10 | Intro - Installation Tips - R-TEC Automation Track System

                 0:02:16 | Bracket Location

                 0:03:49 | Wall Mount Assembly OR Ceiling Mount Assembly

                 0:04:04 | Install System into Quick Connect Clip

                 0:04:29 | Center Opening System

                 0:05:06 | Ripplefold and Pinch Pleat Install End Hooks

                 0:05:15 | Fascia Installation on Track

                 0:05:31 | Finial Installation on Fascia

View the Mastering Motorization Series

VIEW
video img
Mastering Motorization | How To Attach the Motor, Pair & Program R-TEC Automation® Drapery Systems

How To Attach the Motor, Pair & Program R-TEC Automation® Drapery Systems

Table of Contents:

0:00:05 | Intro - Attaching Motors to R-TEC Automation Systems

                 0:00:15 | Align and Engage the Li-ion Battery or AC Power with the Motor

                 0:00:31 | Align and Engage the Motor with the Drive Pulley

                 0:00:42 | Charging Instructions


0:00:53 | Intro - How To Pair and Program Push5 Remote to R-TEC Automation Systems

                0:01:36 | Pair

                0:02:19 | Check and Change Direction of the Motor

                0:03:10 | Set Favorite Position

                0:04:21 | Lock the Remote

                0:05:28 | Reset to Factory Settings


0:06:00 | Intro - How To Pair and Program Push15 Remote to R-TEC Automation Systems

                0:07:16 | Pair

                0:07:52 | Check and Change Direction of the Motor

                0:08:35 | Set Favorite Position

                0:09:17 | Lock the Remote

View the Mastering Motorization Series

VIEW
video img
How to Assemble R-TEC Automation® One-Way Draw Traverse System
Learn how to assemble a R-TEC Automation® One-Way Draw Traverse System.
VIEW
video img
How to Assemble R-TEC Automation® Double Splice Track System
Learn how to unbox, unpackage and assemble your R-TEC Automation® Double Splice Track System. 2-person assembly and installation suggested. For more videos, visit R-TEC Automation® Product Videos.
VIEW
video img
How to Assemble R-TEC Automation® Single Splice Track System
Learn how to unbox, unpackage and assemble your R-TEC Automation® Single Splice Track System. 2-person assembly and installation suggested. For more videos, visit R-TEC Automation® Product Videos.
VIEW
video img
How to Remove Extra Pinch Pleat Carriers from the R-TEC Automation® Track Systems
Learn how to remove extra pinch pleat carriers from the R-TEC Automation® Track Systems. 2-person assembly and installation suggested. For more videos, visit R-TEC Automation® Product Videos.
VIEW
video img
How to Remove Extra Ripplefold Carriers from the R-TEC Automation® Track Systems
Learn how to remove extra Ripplefold carriers from the R-TEC Automation® Track Systems. 2-person assembly and installation suggested. For more videos, visit R-TEC Automation® Product Videos.
VIEW
R-TEC Automation® - Shade Systems
video img
Mastering Motorization | How To Assemble R-TEC Automation® Shade Tube

How To Assemble R-TEC Automation® Shade Tube

Table of Contents:

0:00:05 | Intro - R-TEC Automation® Shades

                 0:01:11 | Components

                 0:01:59 | Attach the Crown & Drive Set to the Shade Motor

                 0:02:43 | Place Motor Adapter on End of the Motor

                 0:03:45 | Slide Motor into Tube

                 0:04:10 | Place the End Pin in Tube

                 0:04:29 | Summary

                 0:04:45 | Custom Solutions

View the Mastering Motorization Series

VIEW
video img
Mastering Motorization | How To Pair & Program R-TEC Automation® Shades

How To Pair & Program R-TEC Automation® Shades

Table of Contents:

0:00:05 | Intro - Basic Programming for R-TEC Automated Shade Systems

                 0:00:30 | Pair the Motor to the Remote

                 0:01:08 | Check or Change the Direction of the Shade Motor

                 0:01:55 | Set the Upper and the Lower Limits

                 0:05:05 | Set a Favorite Position

                 0:06:48 | Lock the Remote

                 0:07:55 | Reset to Factory Settings

View the Mastering Motorization Series

VIEW
video img
How to Assemble R-TEC Automation® Wireless Tubular Motors
Learn how to assemble a R-TEC Automation® Wireless Tubular Motors.
VIEW
Shades
video img
Inside Look: Elements® Roller Shade Machine
All Elements® shades are assembled in the USA. Take an inside look at the state-of-the art roller shade machine in our Dallas, TX facility.
Roller Shade Fabric Shown: RS2-1402, Nightfall Room Darkening in Mason Gray
VIEW
video img
Attaching Shades to EZ Rig Track with Hook & Loop Tape
Learn how to attach your roman shade to the EZ-Rig™ Shade System track using hook and loop tape. This is the only lift system that allows you to mount directly to the system, eliminating the need for a mounting board.
VIEW
video img
Cord Adjuster Orbs
In this video you will see how to use a Cord Adjuster Orb. This is a great little product that is added to the bottom of the lift cord on shades, allowing for easy adjustment in the workroom, or on the window.
VIEW
video img
EZ Rig Shade System
Learn how to assemble the EZ Rig Shade System. This system is used to operate soft shades such as Roman, Balloon or Hobbled Styles.
VIEW
video img
Fiberglass Shade Ribs & Splices
We'll show you our fiberglass ribs and rib splices, as well as how to cut the ribs and connect scraps using the splices.
VIEW
video img
How to Assemble R-TEC Automation® Wireless Tubular Motors
Learn how to assemble a R-TEC Automation® Wireless Tubular Motors.
VIEW
video img
Cutting Elements® Express Cellular Shades
Learn how to cut your Elements® Express Cellular Shades.
VIEW
video img
Installing the Universal Drive Cord Tension Device
See how to install the Universal Drive Tension Device with bead chain loop. This device is used on bead and cord loops to keep them taut and secure and complies with the 2010 ANSI Standards for Corded Window Coverings.
VIEW
video img
Introducing Elements® Shade Collection

Learn about our new Elements® Shade Collection features and benefits, customized options to specify the perfect shade solutions, and how to purchase and tools available to sell the Elements® program to your customers.
VIEW
video img
Introduction to Cord Lock and Pulleys
Watch as we demonstrate how to use our Cord Locks and Pulleys. You'll learn about how to determine the base size you need and lift cord.
VIEW
video img
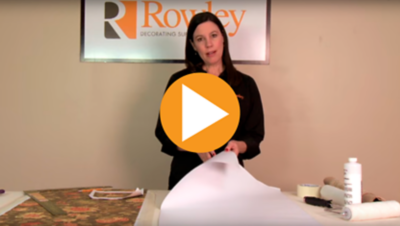
Laminated Roller Shades
In this video you will see how easy it is to create a custom laminated roller shade using your fabric. You will see the supplies needed for this project including the laminating adhesive and room darkening shade cloth from Rowley Company. Laminated shades can be used alone or layered with draperies or top treatments.
VIEW
video img
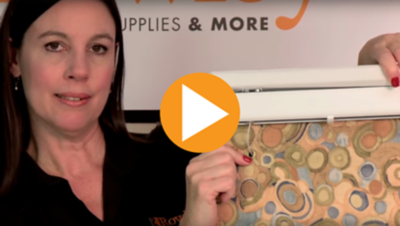
Laminating Adhesive
Let us show you how to use our Laminating Adhesive.
VIEW
video img
Reverse Mounted Shade with EZ Rig System
See how to use the EZ-Rig™ Shade System for reverse mounted roman shades. Reverse mounted shades are closer to the window glass, allowing better coverage and less light gap.
VIEW
video img
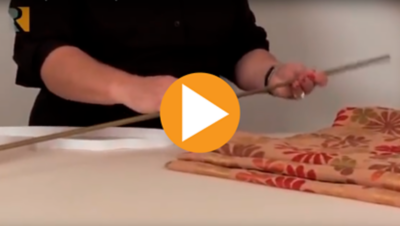
Roman Shade Weight Bar & Fabric Tubing
Watch as we demonstrate how to use our Roman Shade Weight Bars & Fabric Tubing.
VIEW
video img
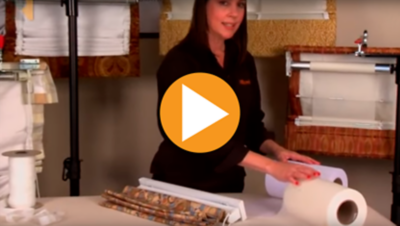
Shade Operating Systems for Sure-Shade
Learn about each of the operating or lifting systems that can be used with Rowley Company's Sure-Shade components. Systems include EZ-Rig, Roller Spring, Roller Clutch and Traversing Clutch.
VIEW
video img
Sure-Shade™ Components
Join Rowley Company for a brief overview of the new Sure-Shade Roman Shade components. These new products are used to make a shade which is free of hazardous loops. The products include: Encased Lift Cord Shroud Tape, Lift Bands and Universal Drive Tension Device.
VIEW
video img
Sure-Shade™ Encased Lift Cord Shroud Tape
See how easy it is to construct a Roman shade that is free of hazardous loops using Rowley Company's Sure-Shade™ Encased Lift Cord Shroud Tape.
VIEW
video img
Sure-Shade™ Encased Lift Cord Shroud Tube
This new product can be used on any type of soft shade. Sew to the back of your shade and then thread the encased cord into your lift system. The shroud around the cord prevents the cord from being pulled from the shade, creating a large loop.
VIEW
video img
Sure-Shade™ Lift Band Shades
Watch as we demonstrate how to make a Roman shade using Sure-Shade Lift Bands with fiberglass ribs, end caps and center support rings. This type of shade is accepted in the 2010 ANSI Corded Window Covering Standards.
VIEW
video img
Sure-Shade™ Universal Drive Tension Device
See a short video showing the new Sure-Shade Universal Drive Tension Device that complies to the 2010 ANSI Corded Window Covering Standards.
VIEW
video img
Troubleshooting the Soft Shade Traversing Clutch System
This video addresses the most common questions regarding the Soft Shade Traversing Clutch system.
VIEW
Traversing Window Treatments
video img
How To Order R-TEC Automation® Drapery Hardware Systems

How To Order R-TEC Automation® Drapery Hardware Systems

Table of Contents:

0:00:05 | Intro - How To Order R-TEC Automated Track Systems

                 0:00:45 | Step 1 - Select the System

                 0:01:19 | Step 2 - Select the Track Color

                 0:01:49 | Step 3 - Select the Motor Power

                 0:02:30 | Step 4 - Select the Drapery Style, Draw & Master Carrier

                 0:03:56 | Step 5 - Select the R-TEC Smart Controls


0:04:55 | Intro - How To Order Automated 1 3/8" H-Rail

                 0:05:40 | Step 1 - Select Kit Style

                 0:06:30 | Step 2 - Select the Kit Finish

                 0:06:57 | Step 3 - Select the Select the Motor Power

                 0:07:44 | Step 4 - Select the Drapery Style, Draw & Master Carrier

                 0:08:56 | Step 5 - Select R-TEC Smart Controls

View the Mastering Motorization Series

VIEW
video img
Mastering Motorization | Components & Add-Ons in R-TEC Automation® Drapery Hardware Systems

Components & Add-Ons in R-TEC Automation® Drapery Hardware Systems

Table of Contents:

0:00:05 | Intro - R-TEC Automation® Track System Components

0:00:27 | Intro - Components for Automated 1 3/8" H-Rail Systems

0:00:42 | Push 5 Channel Handheld Remote

0:00:48 | Slim Drapery Motor, Li-ion Battery + Charger

0:01:00 | AC Power Options

0:01:20 | AriA® Antiquities Finials

0:01:38 | Intro - Components for R-TEC Automated Track Systems

0:01:49 | Push 5 Channel Handheld Remote

0:01:53 | Slim Drapery Motor, Li-ion Battery + Charger

0:02:00 | AC Power Options

0:02:07 | Finestra® Fascia + Finials

View the Mastering Motorization Series

VIEW
video img
Mastering Motorization | How To Install R-TEC Automation® Drapery Hardware Systems

How To Install R-TEC Automation® Drapery Hardware Systems

Table of Contents:

0:00:05 | Intro - Installation Tips - Automated 1 3/8" H-Rail Traverse

                 0:00:22 | Bracket Mounting Recommendations

                 0:00:49 | Installing the H-Rail Brackets

                 0:01:42 | Installing the System


0:02:10 | Intro - Installation Tips - R-TEC Automation Track System

                 0:02:16 | Bracket Location

                 0:03:49 | Wall Mount Assembly OR Ceiling Mount Assembly

                 0:04:04 | Install System into Quick Connect Clip

                 0:04:29 | Center Opening System

                 0:05:06 | Ripplefold and Pinch Pleat Install End Hooks

                 0:05:15 | Fascia Installation on Track

                 0:05:31 | Finial Installation on Fascia

View the Mastering Motorization Series

VIEW
video img
Mastering Motorization | How To Attach the Motor, Pair & Program R-TEC Automation® Drapery Systems

How To Attach the Motor, Pair & Program R-TEC Automation® Drapery Systems

Table of Contents:

0:00:05 | Intro - Attaching Motors to R-TEC Automation Systems

                 0:00:15 | Align and Engage the Li-ion Battery or AC Power with the Motor

                 0:00:31 | Align and Engage the Motor with the Drive Pulley

                 0:00:42 | Charging Instructions


0:00:53 | Intro - How To Pair and Program Push5 Remote to R-TEC Automation Systems

                0:01:36 | Pair

                0:02:19 | Check and Change Direction of the Motor

                0:03:10 | Set Favorite Position

                0:04:21 | Lock the Remote

                0:05:28 | Reset to Factory Settings


0:06:00 | Intro - How To Pair and Program Push15 Remote to R-TEC Automation Systems

                0:07:16 | Pair

                0:07:52 | Check and Change Direction of the Motor

                0:08:35 | Set Favorite Position

                0:09:17 | Lock the Remote

View the Mastering Motorization Series

VIEW
video img
Assembly of R-TRAC Track for Cord Draw
See how to assemble hardware for cord-draw draperies.
VIEW
video img
Attaching Ripplefold Snap Tape to R-TRAC System
See how to attach snap tape to R-Trac hardware for ripplefold style panels including adjustments taken for overlaps and returns.
VIEW
video img
Curtain Rod Threading Tips
Learn how to use Curtain Rod Threading Tips to make gathering fabric onto curtain rods easier.
VIEW
video img
How to Assemble R-TEC Automation® One-Way Draw Traverse System
Learn how to assemble a R-TEC Automation® One-Way Draw Traverse System.
VIEW
video img
How to Assemble R-TEC Automation® Double Splice Track System
Learn how to unbox, unpackage and assemble your R-TEC Automation® Double Splice Track System. 2-person assembly and installation suggested. For more videos, visit R-TEC Automation® Product Videos.
VIEW
video img
How to Change the Cord Position on R-TRAC Cord Draw Track Systems
Learn how to change the cord position on your R-TRAC 4001 Cord Draw Track Systems.
VIEW
video img
How to Assemble R-TEC Automation® Single Splice Track System
Learn how to unbox, unpackage and assemble your R-TEC Automation® Single Splice Track System. 2-person assembly and installation suggested. For more videos, visit R-TEC Automation® Product Videos.
VIEW
video img
How to Remove Extra Pinch Pleat Carriers from the R-TRAC Cord Draw Track Systems
Learn how to remove extra Pinch Pleat carriers from your R-TRAC 4001 Cord Draw Track Systems.
VIEW
video img
How to Remove Extra Pinch Pleat Carriers from the R-TEC Automation® Track Systems
Learn how to remove extra pinch pleat carriers from the R-TEC Automation® Track Systems. 2-person assembly and installation suggested. For more videos, visit R-TEC Automation® Product Videos.
VIEW
video img
How to Remove Extra Ripplefold Carriers from the R-TEC Automation® Track Systems
Learn how to remove extra Ripplefold carriers from the R-TEC Automation® Track Systems. 2-person assembly and installation suggested. For more videos, visit R-TEC Automation® Product Videos.
VIEW
video img
How to Remove Extra Ripplefold Carriers from the R-TRAC Cord Draw Track Systems
Learn how to remove extra Ripplefold carriers from your R-TRAC 4001 Cord Draw Track Systems.
VIEW
video img
R-TRAC Baton Draw for Ripplefold
See how to assemble the R-Trac hardware for Ripplefold panels including inserting carriers and master carriers.
VIEW
video img
R-TRAC Baton Draw with Carriers for Pins
Learn how to assemble traversing track hardware for drapery with pins.
VIEW
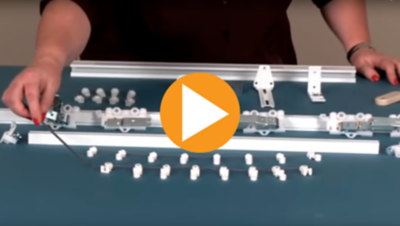
video img
R-TRAC Drapery Hardware Components
An overview of the R-Trac drapery track hardware including carriers, track and brackets.
VIEW
video img
Stringing a Traverse Rod
See how to add cord to a traversing rod.
VIEW
Upholstery
video img
Adhesive Web
Find out how to use Adhesive Web to stabilize box pleats and make soft cornices.
VIEW
video img
Air Stapler Use and Care
Learn about the features and benefits of using Rowley Company's Air Stapler for upholstery and cornice construction. See how to maintain your pneumatic stapler for longer life.
VIEW
video img
Cambric Upholstery Fabric
Learn how to use cambric fabric in your upholstery projects.
VIEW
video img
Cardboard Tack Strip
See a neat trick for using Rowley Company Cardboard Tack Strip
VIEW
video img
Diamond Head Upholstery Tacks
Beautiful decorative upholstery tacks can add sparkle to your upholstered furniture, headboards and more.
VIEW
video img
FirmaFlex Fiberboard
Watch as we demonstrate our unique and exclusive product, FirmaFlex, which is lightweight, mold and mildew resistant, and can be easily cut with a jig saw, rotary cutter or razor blade. FirmaFlex can be steamed and curved into complex shapes, making it perfect for arched windows, shaped ottomans and more.
VIEW
video img
Flexible Metal Tack Strip
Learn how to use Flexible Metal Tack Strip in your upholstery projects.
VIEW
video img
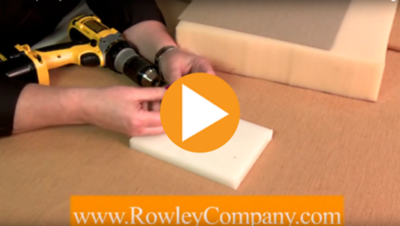
Foam Hole Cutter for Upholstery
See how to use a foam hole cutter to cut perfect holes in foam for button tufting.
VIEW
video img
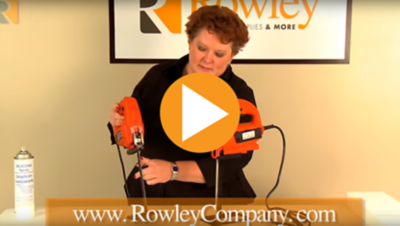
Foam Saw
Learn how to use the Foam Saw from Rowley Company, to save time when cutting foam for your indoor or outdoor upholstery projects.
VIEW
video img
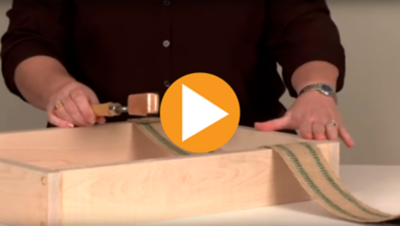
Jute Stretcher
Join Rowley Company as we demo how to use our Jute Stretcher for upholstery projects.
VIEW
video img
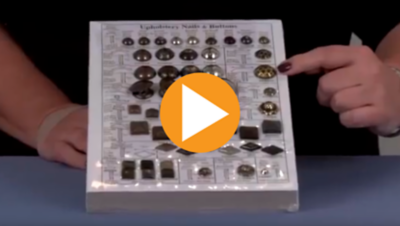
Magnetic Tack Hammer
Learn about the features of our magnetic tack hammer for upholstery.
VIEW
video img
Skirtex
Skirtex is a material used for upholstery or soft cornices.
VIEW
video img
Upholstery Marking Chalk
Learn more about the upholstery weight chalk for marking fabrics.
VIEW
video img
Upholstery Nails
Learn more about the Upholstery Nail and Button sample board. It's a great selling tool!
VIEW
video img
Upholstery Regulators
In this video you will learn more about Upholstery Regulators and how they are used in the upholstery workroom.
VIEW
video img
Upholstery Staple and Nail Removers
Learn how to use two common upholstery tools to remove staples and nails.
VIEW
video img
Upholstery Tufting Needle
Learn how to use a Tufting Needle to add or replace buttons on upholstered furniture.
VIEW
video img
Beginner Upholstery Tips from Kim's Upholstery
Kim Chagnon from Kim's Upholstery shares her top three tips for people new to the upholstery world.
VIEW
video img
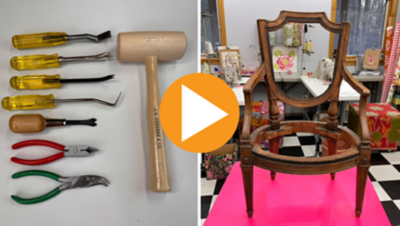
Upholstery Teardown Tools
In this video, Kim Chagnon, from Kim's Upholstery walks you through upholstery tools used during the teardown process. She highlights how to use each tool to remove a dustcover, old fabric, and staples.
Tools listed in video:
VIEW
video img
Reupholstering the Seat of a Shield Back Chair Using Jute Webbing
In this video, Kim Chagnon, from Kim's Upholstery breaks down how to reupholster the seat of a shield back chair using jute webbing.
Tools listed in video:
VIEW
video img
Reupholstering the Back of a Shield Back Chair Using Synthetic Sagless
In this video, Kim Chagnon, from Kim's Upholstery breaks down how to reupholster the back of a shield back chair using synthetic sagless.
Tools listed in video:
VIEW
video img
Adding Upholstery Batting to a Shield Back Chair
In this video, Kim Chagnon, from Kim's Upholstery shows you how to use Polyester Upholstery Batting to add comfort and support to a shield back chair.
Tools listed in video:
VIEW
video img
Finishing Steps for Reupholstering a Shield Back Chair
In this video, Kim Chagnon, from Kim's Upholstery shows you how to use a rotary cutter to make welt cord and how to apply our cambric dust cover for a shield back chair.
Tools listed in video:
VIEW
Workroom
video img
Basting-Tacking Gun
Let us show you how to use our Basting-Tacking Gun.
VIEW
video img
Bead Chain Splicing Tool
With this tool you can splice together bead chain to create a custom size bead chain loop.
VIEW
video img
Buckram Sample Pack
See what is included in the Rowley Company Buckram Sample Pack.
VIEW
video img
Button Form Clasp
Locking Button Form Clasps
VIEW
video img
Clear Poly Tubing
See Rowley Company 's Clear Poly Tubing which protects your custom made window treatments during transport to client's home.
VIEW
video img
ContourFlex
Learn how to use ContourFlex to make decorative buttons of any size. ContourFlex is a 3/8 bendable fiber board that can be used in upholstery, for appliqués or whenever a thin, flexible board is needed.
VIEW
video img
Custom Labels
Learn more about our custom label solutions for your business.
VIEW
video img
Custom Solutions
Rowley Company offers Custom Solutions, shade and drapery systems made to your specifications.
VIEW
video img
Cutting and Setting Die Care and Storage
Learn how to properly clean and store cutters and setters for the grommet press.
VIEW
video img
Cutting and Setting Grommets
Learn how to cut and set grommets using the Grommet Press from Rowley.
VIEW
video img
Decorative Grommets: Nomad Design
These grommets can be used for drapery panels or as a decorative accent on pillows, cornice boards or shades.
VIEW
video img
Drapery Straps
See how-to use Rowley Company drapery straps to transport your custom made window treatments to your client's home.
VIEW
video img
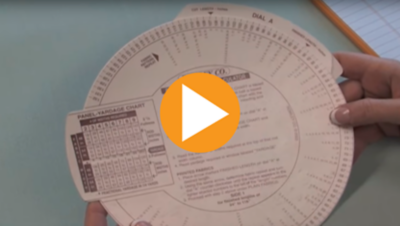
Drapery Yardage Calculator
Learn how to use our drapery yardage calculator to determine the yardage needed for the specific panel size you are fabricating.
VIEW
video img
Dry Spot Remover
Watch Rowley Company 's dry spot remover work to remove a stain.
VIEW
video img
Easy Glide Shower Curtain Rings
Watch as we show how the Easy Glide Shower Curtain Rings work.
VIEW
video img
Electric Rotary Cutter
Watch as we demonstrate how to use our hand held electric cutter. Dual blade system prevents fabric from slipping and ensures accurate cutting of most fabric.
VIEW
video img
Euro Measuring Stick
Learn the features of our Euro Measuring Stick which telescopes up to 197", making it very easy to measure wide openings alone.
VIEW
video img
Extra Wide Lint Roller
Extra wide lint roller saves time cleaning up your work table, removing pet hair from upholstery and more.
VIEW
video img
EZ-Set Grommets and Grommet Setter
Learn how to use the EZ-Set™ Grommets and Grommet Setter for window treatments and as embellishments.
VIEW
video img
Fabric ID Tape
Learn how-to use Rowley Company Fabric ID Tape.
VIEW
video img
Fabric Protectant Spray
Learn the uses for Rowley Company Fabric Protectant Spray. Similar to 3M's Scotch Guard.
VIEW
video img
Fabric Sample Card
See what is included in the fabric sample card from Rowley Company.
VIEW
video img
Fabric Stapler
See how to use a fabric stapler.
VIEW
video img
Flat Worktable Weights
Learn how to use the Rowley Company flat worktable weights in the drapery workroom.
VIEW
video img
Fringe Adhesive
Neat tip for using Rowley Company's Fringe Adhesive to glue baste when sewing. See this glue basting technique used on a valance sample, and learn how to save time at the sewing machine.
VIEW
video img
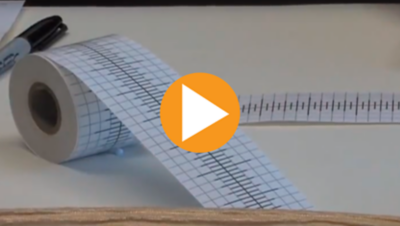
GridLine Tape
Watch as we show you how to us the gridline tape. It's a adhesive tape with grid markings preprinted for marking wall hole positions for finial and medallion mounted treatments.
VIEW
video img
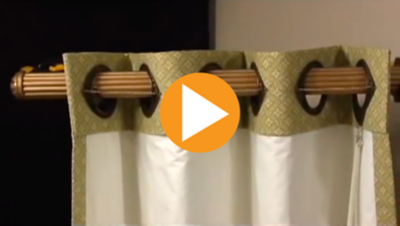
Grom-A-Link
See how to use Grom-A-Link™ on your grommet drapery panels to add batons, swag and banner embellishments or to control spacing.
VIEW
video img
Grommet Sample Packs
See what is included in the Rowley Company Grommet Sample Pack.
VIEW
video img
Grommet Selection
Tips for selecting grommet sizes.
VIEW
video img
Grommet Spacing
How to space your grommets.
VIEW
video img
Grommet Tape
See how to use the Grommet Tape from Rowley Company to make grommet drapery panels.
VIEW
video img
Hand Adapter for Grommets
VIEW
video img
Hem Clip
Let us show you how to use our Hem Clips.
VIEW
video img
High Temperature Glue Gun
Let us show you how to use our High Temp Glue Gun.
VIEW
video img
Hook Strip
Watch as we demonstrate how to use our various types of hook strip in drapery installation for different window types. You'll learn about our right-angle, notched and regular hook strip.
VIEW
video img
Introduction to Button & Grommet Press
See all of the projects our grommet press can be used for. It is a real time saver.
VIEW
video img
Iron Soleplate Cleaner
Learn how to use our iron soleplate cleaner to keep your iron free of adhesives and residue.
VIEW
video img
Iron-On Batting
Let us show you how to use our Iron-On Batting. Ideal for making soft cornices, place mats, table runners, slip covers, etc.
VIEW
video img
Iron-On Bonding Tape
Learn How-to use Rowley Company iron on bonding tape to make double width fabrics with matching patterns.
VIEW
video img
Lead Free Weights
Watch as we show you our Lead Free Weights.
VIEW
video img
Lead Weights
Watch as we show you our Lead Weights.
VIEW
video img
Lining
Watch as we demonstrate how to use our BlackOut Linings. Lining materials improve drape and overall look of window coverings.
VIEW
video img
Making Buttons with the Grommet / Button Press
VIEW
video img
Micro Welt Cord
We'll show you a creative use for our Micro Welt Cord.
VIEW
video img
Paint and Wood Stain Markers
Learn more about paint and wood stain markers from Rowley Company.
VIEW
video img
Pattern Making Paper & Draft Tools
Pattern Making (Pattern Making Paper & Drafting Tools)
VIEW
video img
Perfect Pleating Tape
Learn how-to use Rowley Company's perfect pleating tape for box pleats and knife pleats.
VIEW
video img
Picture Enlarger Instructions
Watch as we show you how to use the Picture Enlarger. Great to use when you are sketching window treatments.
VIEW
video img
Pinsetter
Watch as we show you how to use our Pinsetter.
VIEW
video img
Plastic Snap Together Grommets
Plastic grommets can be used for draperies, valances or as embellishments.
VIEW
video img
Pleat Control System
Watch as we demonstrate how to use our Pleat Control System. You'll learn about the quick attach/detach bottom ring and some of the uses.
VIEW
video img
Products for Sheer Materials
Watch as we show you how to use Rowley products for Sheer Materials.
VIEW
video img
Professional Presentation Using Packaging Materials
Watch as we demonstrate how to package your finished window treatments and pillows to deliver to your client, and make a great impression on them.
VIEW
video img
R-TEX Fusible Stabilizer
See how to use R-Tex Fusible Stabilizer to stabilize silk fabric for welt cord and other tips for using this material in your sewing projects.
VIEW
video img
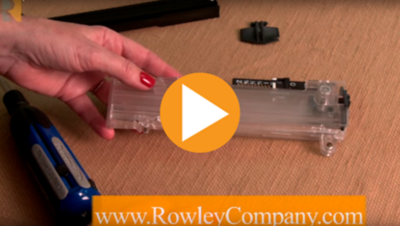
Replace Parts on the Pinsetter
Pinsetters are used to put drapery pin hooks into pleated draperies. This tool gets a lot of use and can become worn over time. Learn how to replace the pick-off and cartridge in the Pinsetter so that you can continue to add pin hooks easily.
VIEW
video img
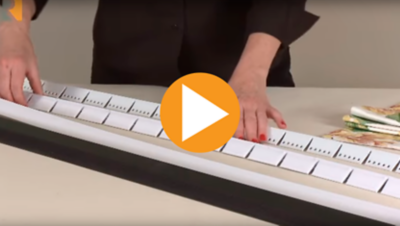
Right Angle Hook and Pin Strip
This product can be used to install draperies, valances, bed skirts and more.
VIEW
video img
Rubber Grommet Washer
Use this product when making grommet draperies with thin or slippery fabrics.
VIEW
video img
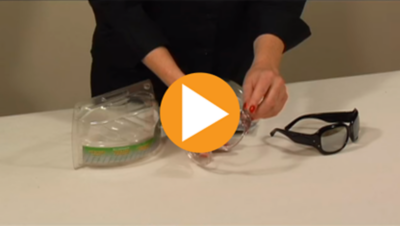
Safety Glasses
Watch as we show you how to use our Safety Glasses. Indoor/outdoor lenses to protect eyes when using electric or air staplers, nailers, jig saws or any power tools.
VIEW
video img
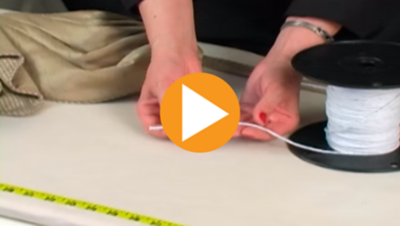
Sausage Bead Weight
We'll show you a creative use for our lead and lead-free sausage bead weight. It can be used as welt cord that will hold a bend.
VIEW
video img
SewGrip Gloves
See our SewGrip gloves demonstrated. They reduce hand fatigue when sewing and stuffing pillows.